Manual Testing With CaIoT:
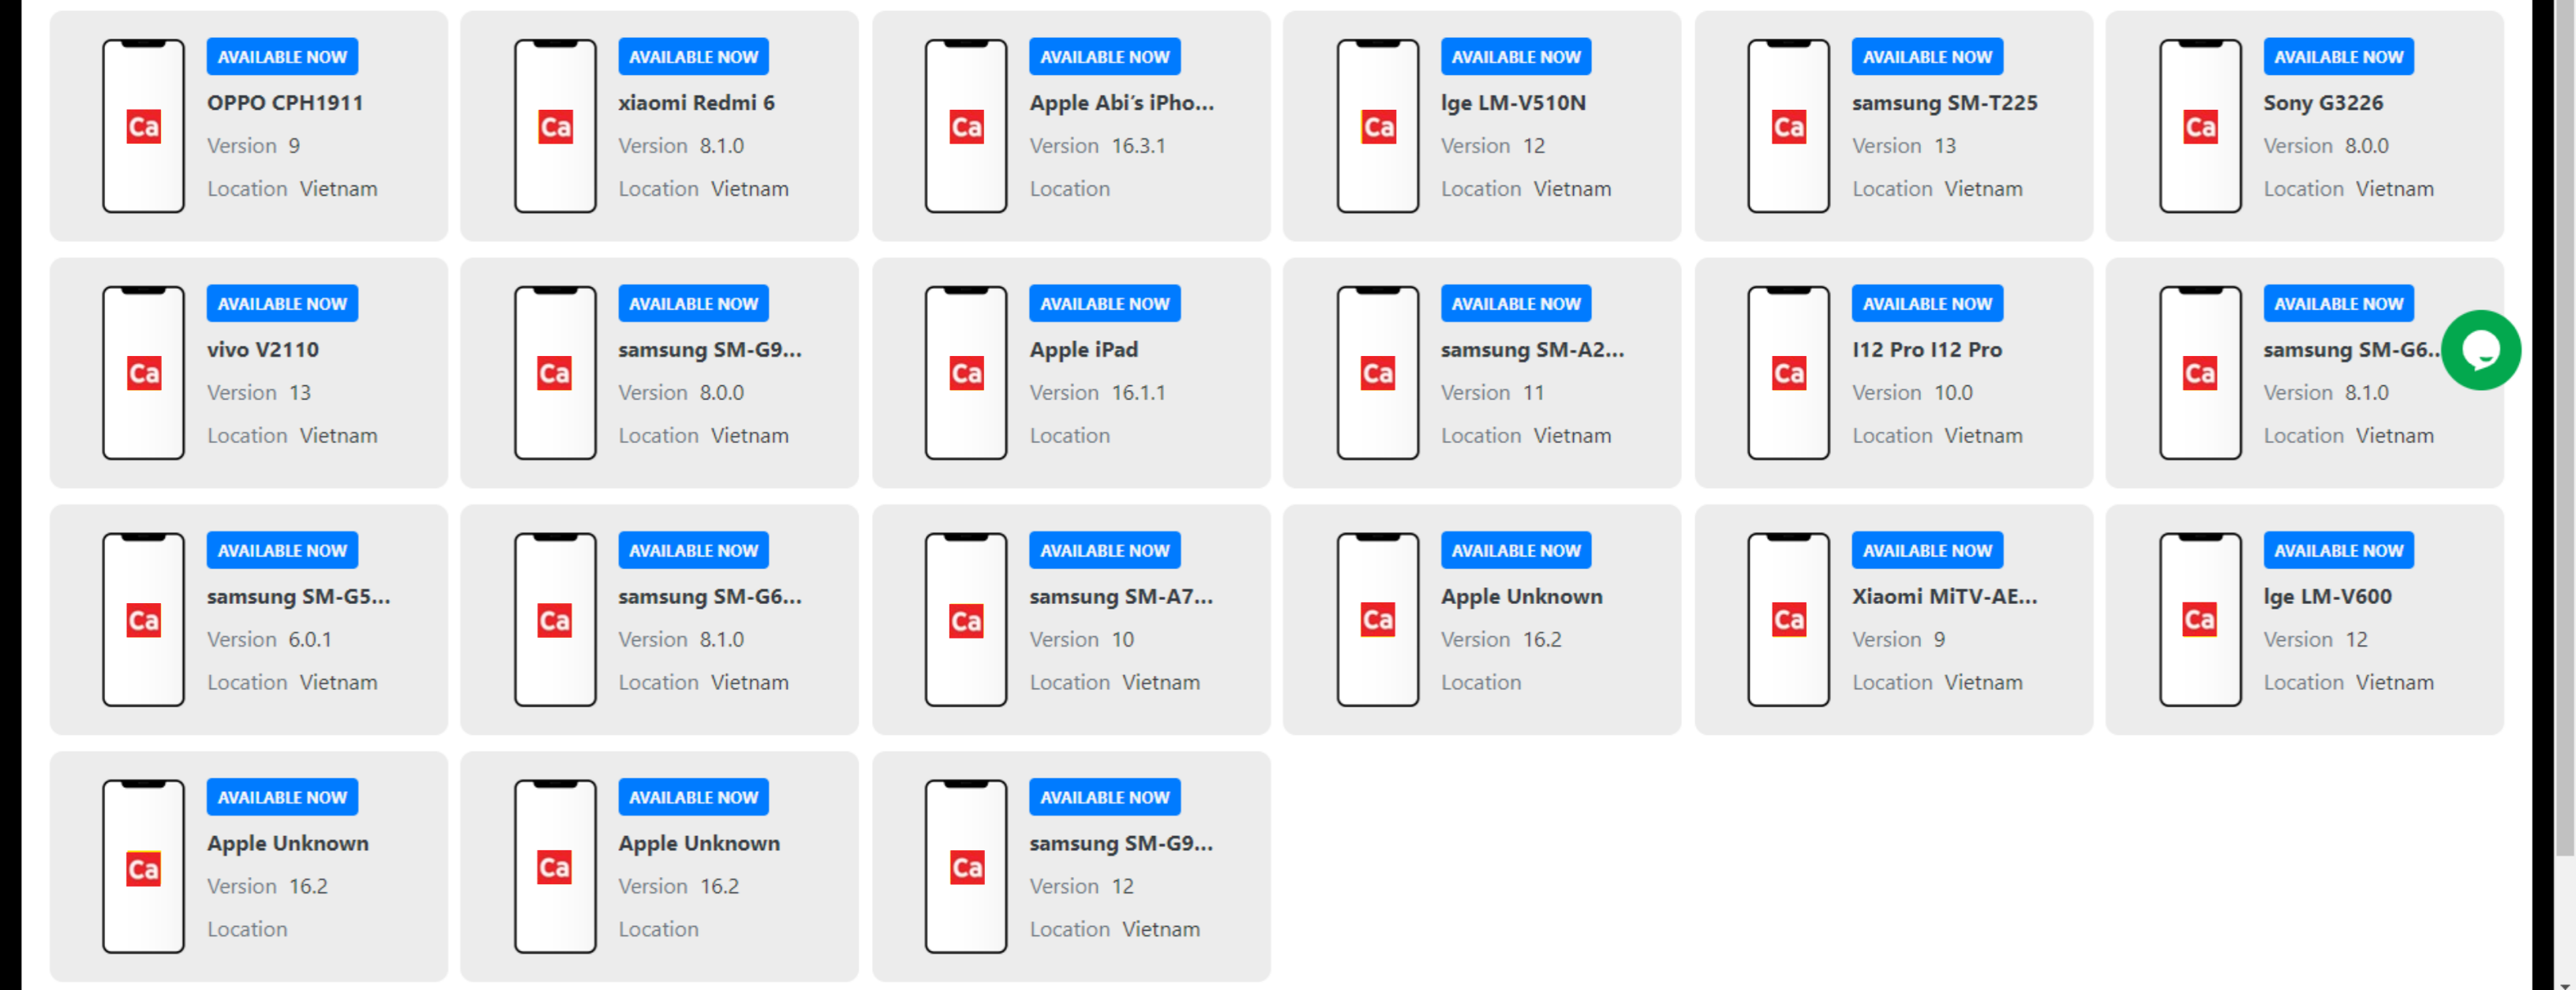
To get started manual testing, you simply need to select a device by clicking on it. This will immediately begin a test session. Note that you can add up to 4 more devices in the same session once it is started. If you are not already on the default “Device Lab” page, select the Device Lab page by clicking on the icon in the top left. Or you can click here. Before selecting a device, you can:

- Choose to see CaIoT devices (Ca), CaIoT Emulators (Ca), your own Company Devices (C), or your own Company Emulators (C).
- Each device displays its name, OS version, and location.
- Request a device to be added which doesn’t already exist on the CaIoT cloud.
- Filter between iOS and Android devices, filter by device status, or search for a specific device to select the exact devices which you want to test on.

- Access a device by clicking on it and move on to the testing interface.
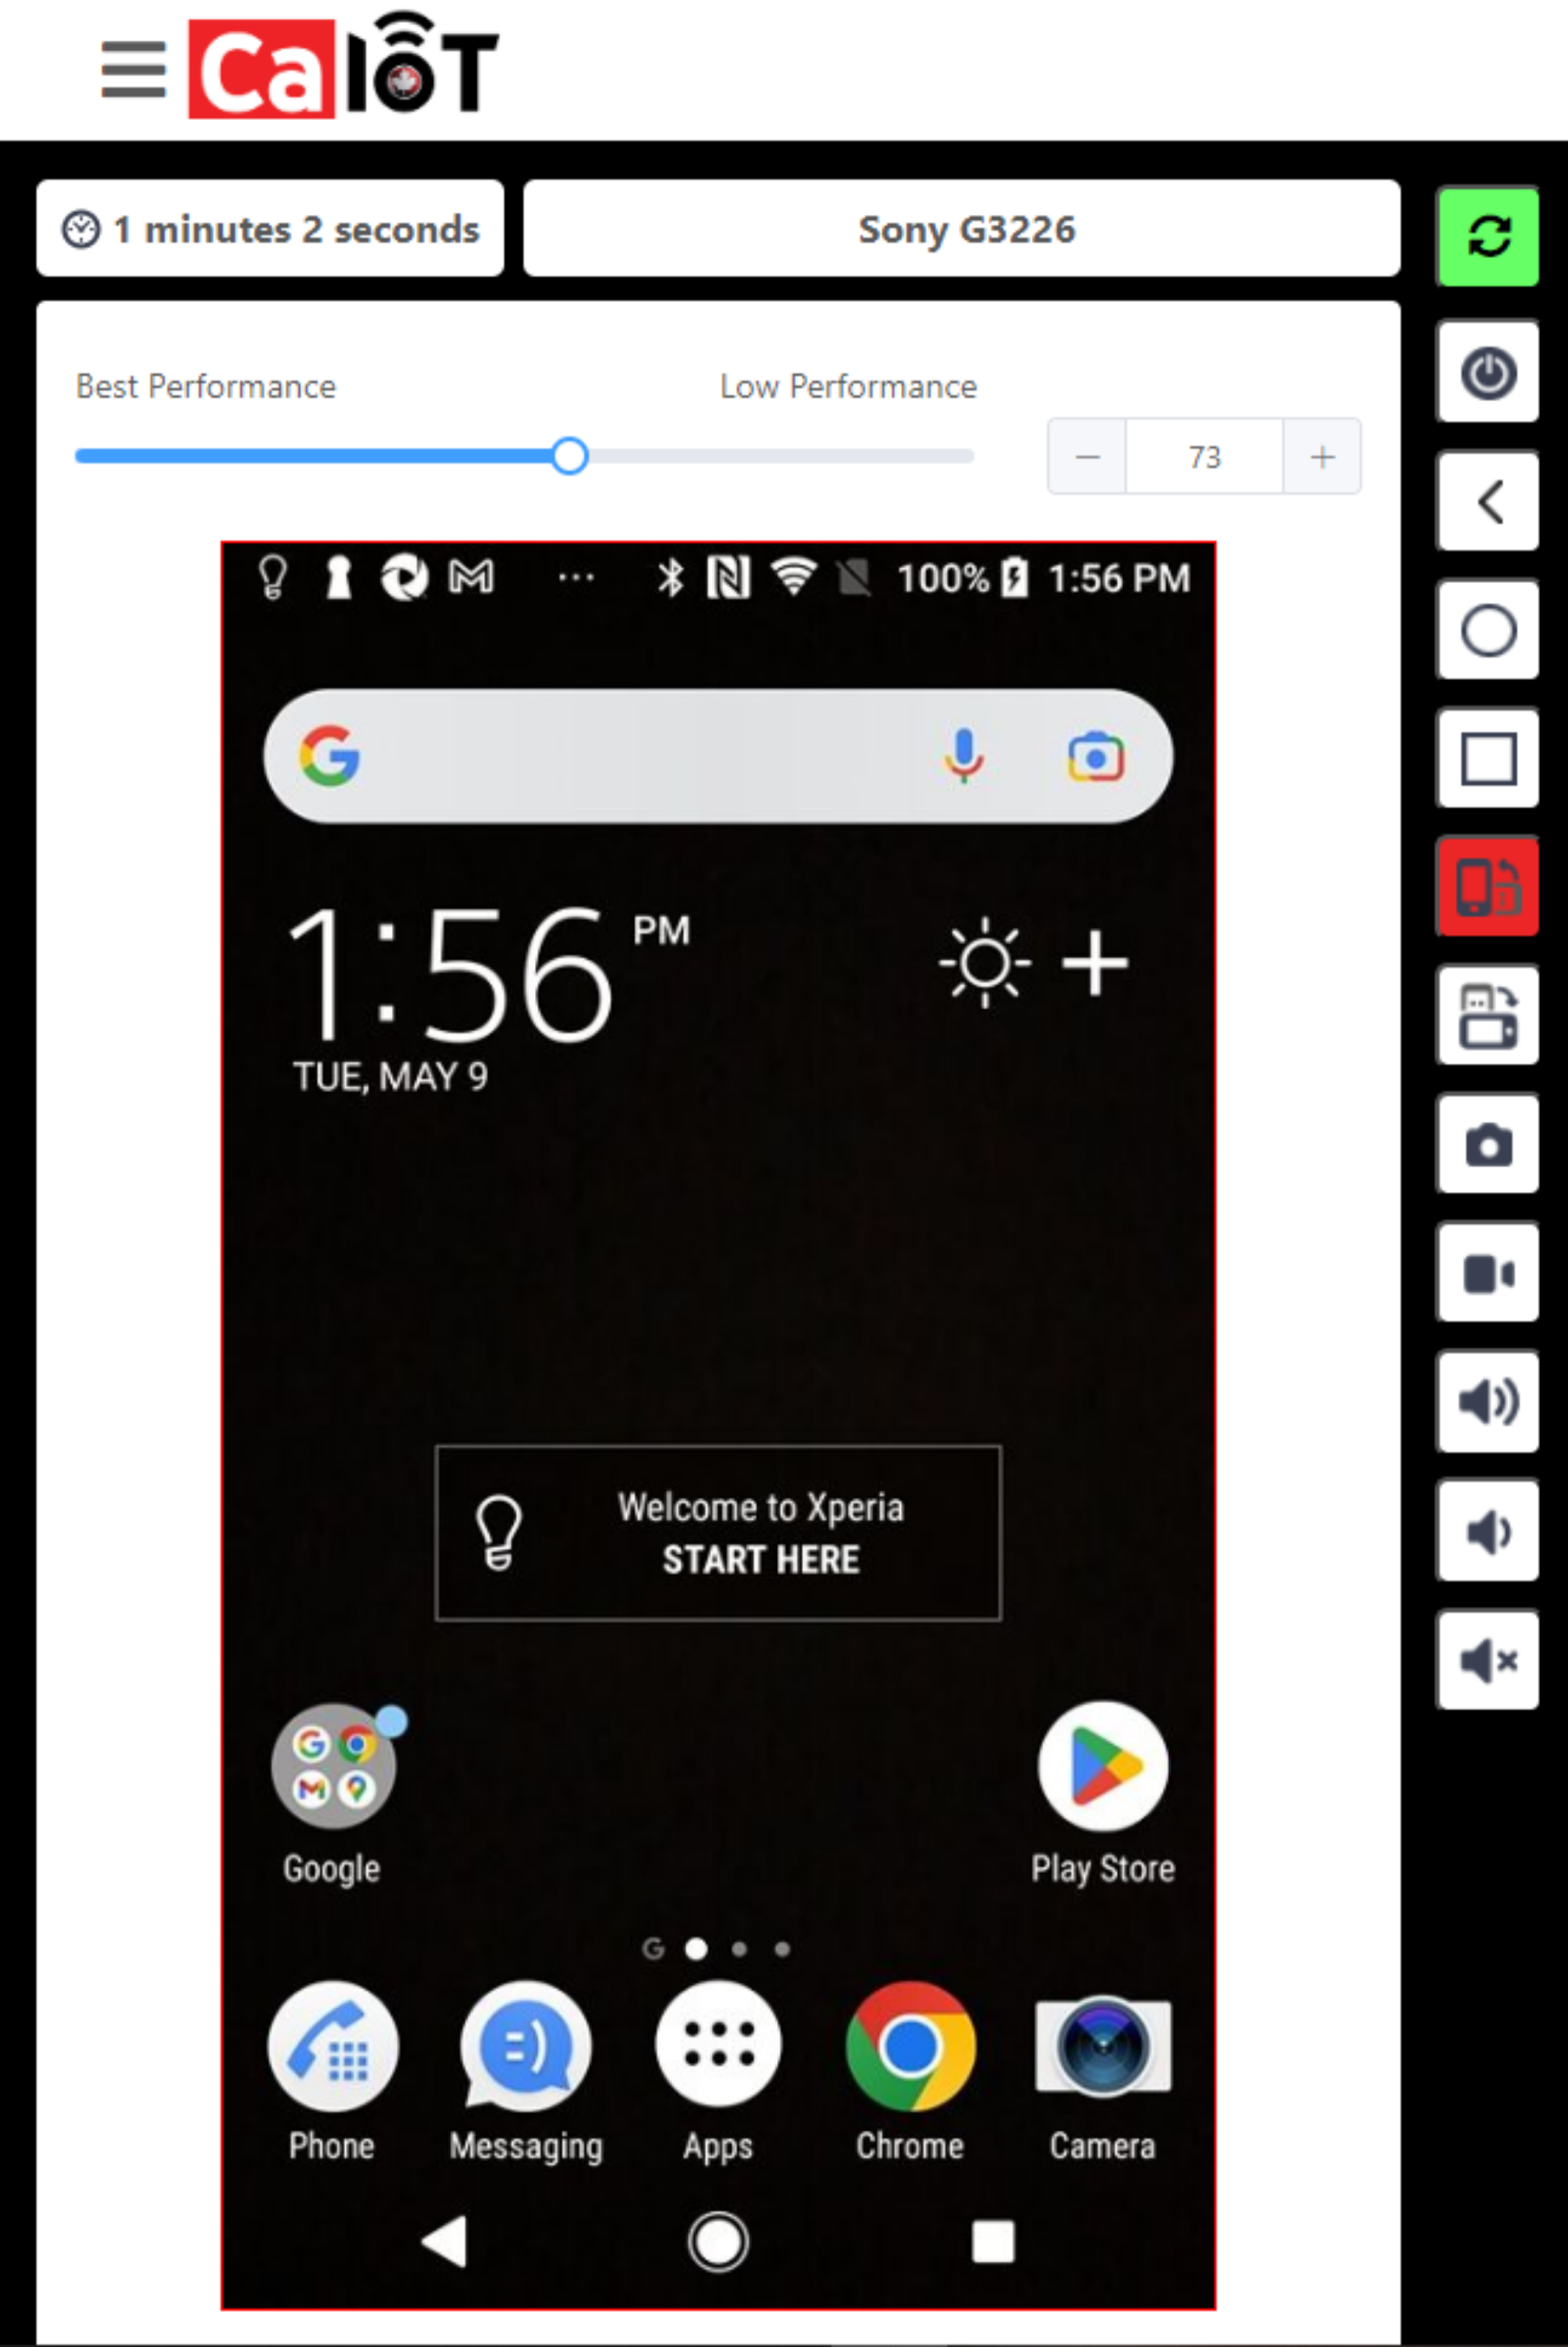
- Once a device is selected, you will be in the test session. Here, you can:
- See how long the test session has been going.
- This helps you to stay informed about the length of the test session.
- Change the size of the device screen.
- This helps to adjust the UI to be optimized for the tester’s preferences and screen size.
- Manually interact with the device by clicking or swiping.
- This is how the core of manual testing is performed. Anything that can be done with a finger can be done here with a mouse or touchpad.
- Control the device by [in descending order]: Powering it off, going back to the previous screen, returning to the home screen, showing all active screens, flipping the screen back to portrait mode, flipping the screen into landscape mode, taking a screenshot, recording a video, turning the volume up, turning the volume down, and muting the volume.
- This provides ease of access to many important settings which you may keep returning to.
- See how long the test session has been going.
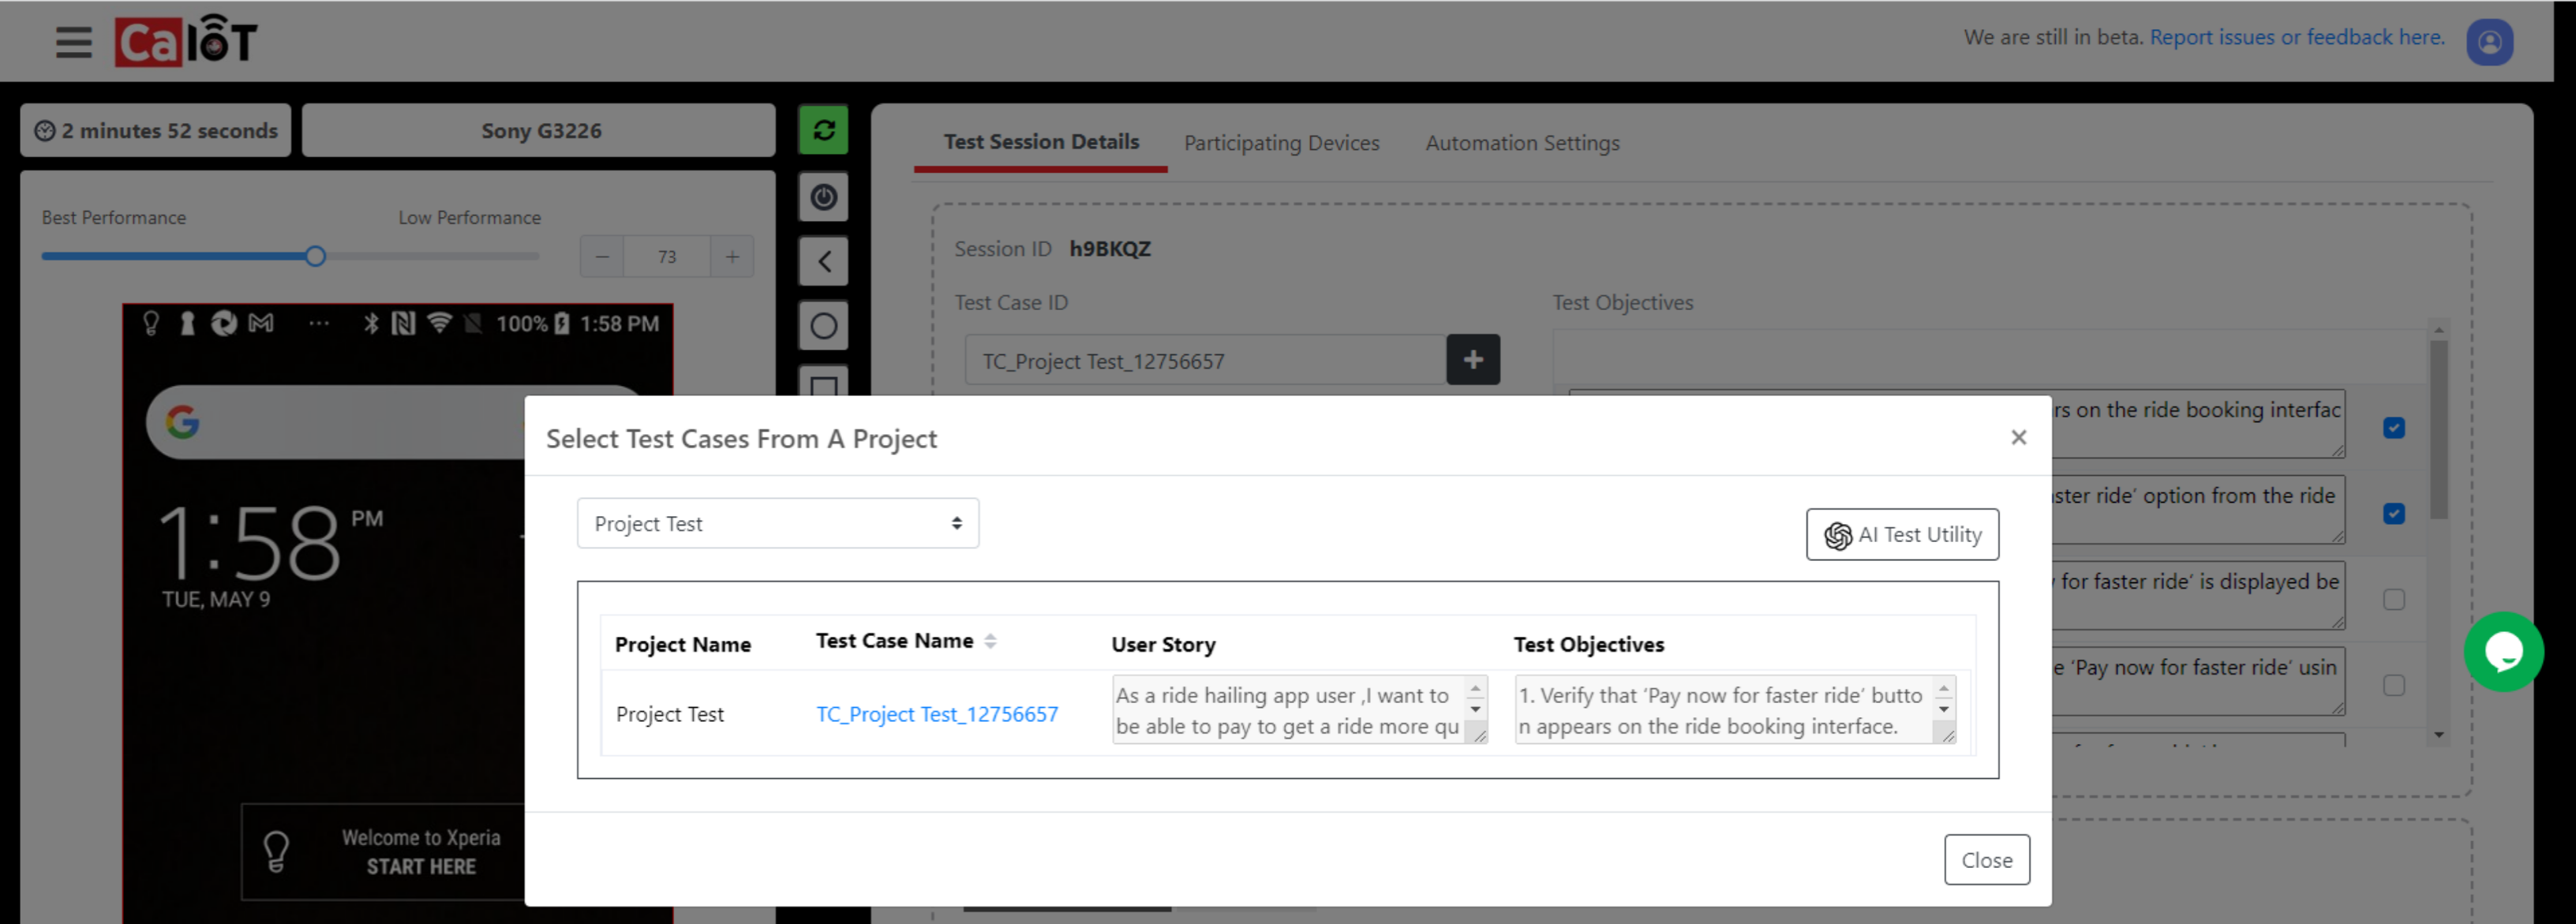
- Apply a Test Case.
- By clicking on the “+” icon, you can add a project you’ve already created in the AI Test Utility page.
- Select a Project.
- Add the Project to the test session by clicking the blue text, which fills in the Test Description box automatically with your existing test cases.
- Enter a test description.
- This allows you to keep track of what you are/were testing during a particular session.
- If you select a project and the project has multiple test cases, you can check the box of each test objective you will be testing during the current session.
- Take and download screenshots.
- This allows you to capture images of any bugs or irregularities you discover and locally download them to your machine for later review.
- Take and download videos.
- This allows you to capture videos of the entire test session or just a part of it, which you can then locally download to your machine for later review.
- Write test remarks.
- This allows you to create remarks about the conclusion of the test beyond just if it passed or failed.
- Mark a test “pass” or “fail”.
- This allows you to easily record if a test was successful or not.
- Save and end the session.
- This allows you to end the session, releasing the device and saving all the details of the session. Test sessions can then be filtered by “Passed” or “Failed” on the Test Sessions History page. It’s also from this page that the Test Result can be changed if needed.
- Note that users who are using the Ca Freemium subscription can save test sessions, but screenshots and videos created during the session will not be saved on the platform and must be downloaded locally.
- Quit the session without saving.
- When this option is selected, a popup will appear asking if you are sure you want to quit the session without saving the results. If you select “YES”, the results will be deleted forever like that session never happened. If you select “NO”, you will be returned to the test session.

- Go to the Participating Devices tab.
- This goes to a new screen which maintains the left side of the interface, but changes the right side of the interface to give you many more testing options and features.
- Go to the Automation Settings tab.
- This goes to a new screen which maintains the left side of the interface, but changes the right side of the interface to give you the information necessary to run an automation session on the device. This tab is discussed in the Automation Testing documentation.

- On the Participating Devices tab, you can:
- Add additional devices to the session.
- This takes you back to the device selection screen so that you can choose another device to add to your current test session and then easily switch between the new device(s) and the original to test the same scenarios across multiple device-OS combinations, screen sizes, etc.
- Add additional devices to the session.

- Upload an APK or IPA file directly from your computer or from the App Repository.
- Uploading from “Computer” allows you to select a file from the computer you are currently testing on and install it directly onto the device.
- Simply click “upload”.
- Select the desired file.
- Then click “Install and Launch”.

- Uploading from “App Repo” allows you to select a file which has already been uploaded to CaIoT’s App Store and install it directly on the device. More information on the App Store can be found in CaIoT's App Store documentation.
- Click the “+” icon.
- Then select a project which has a file already connected to it.
- Click on the affiliated file, shown in blue.
- Then click “Install and Launch”.


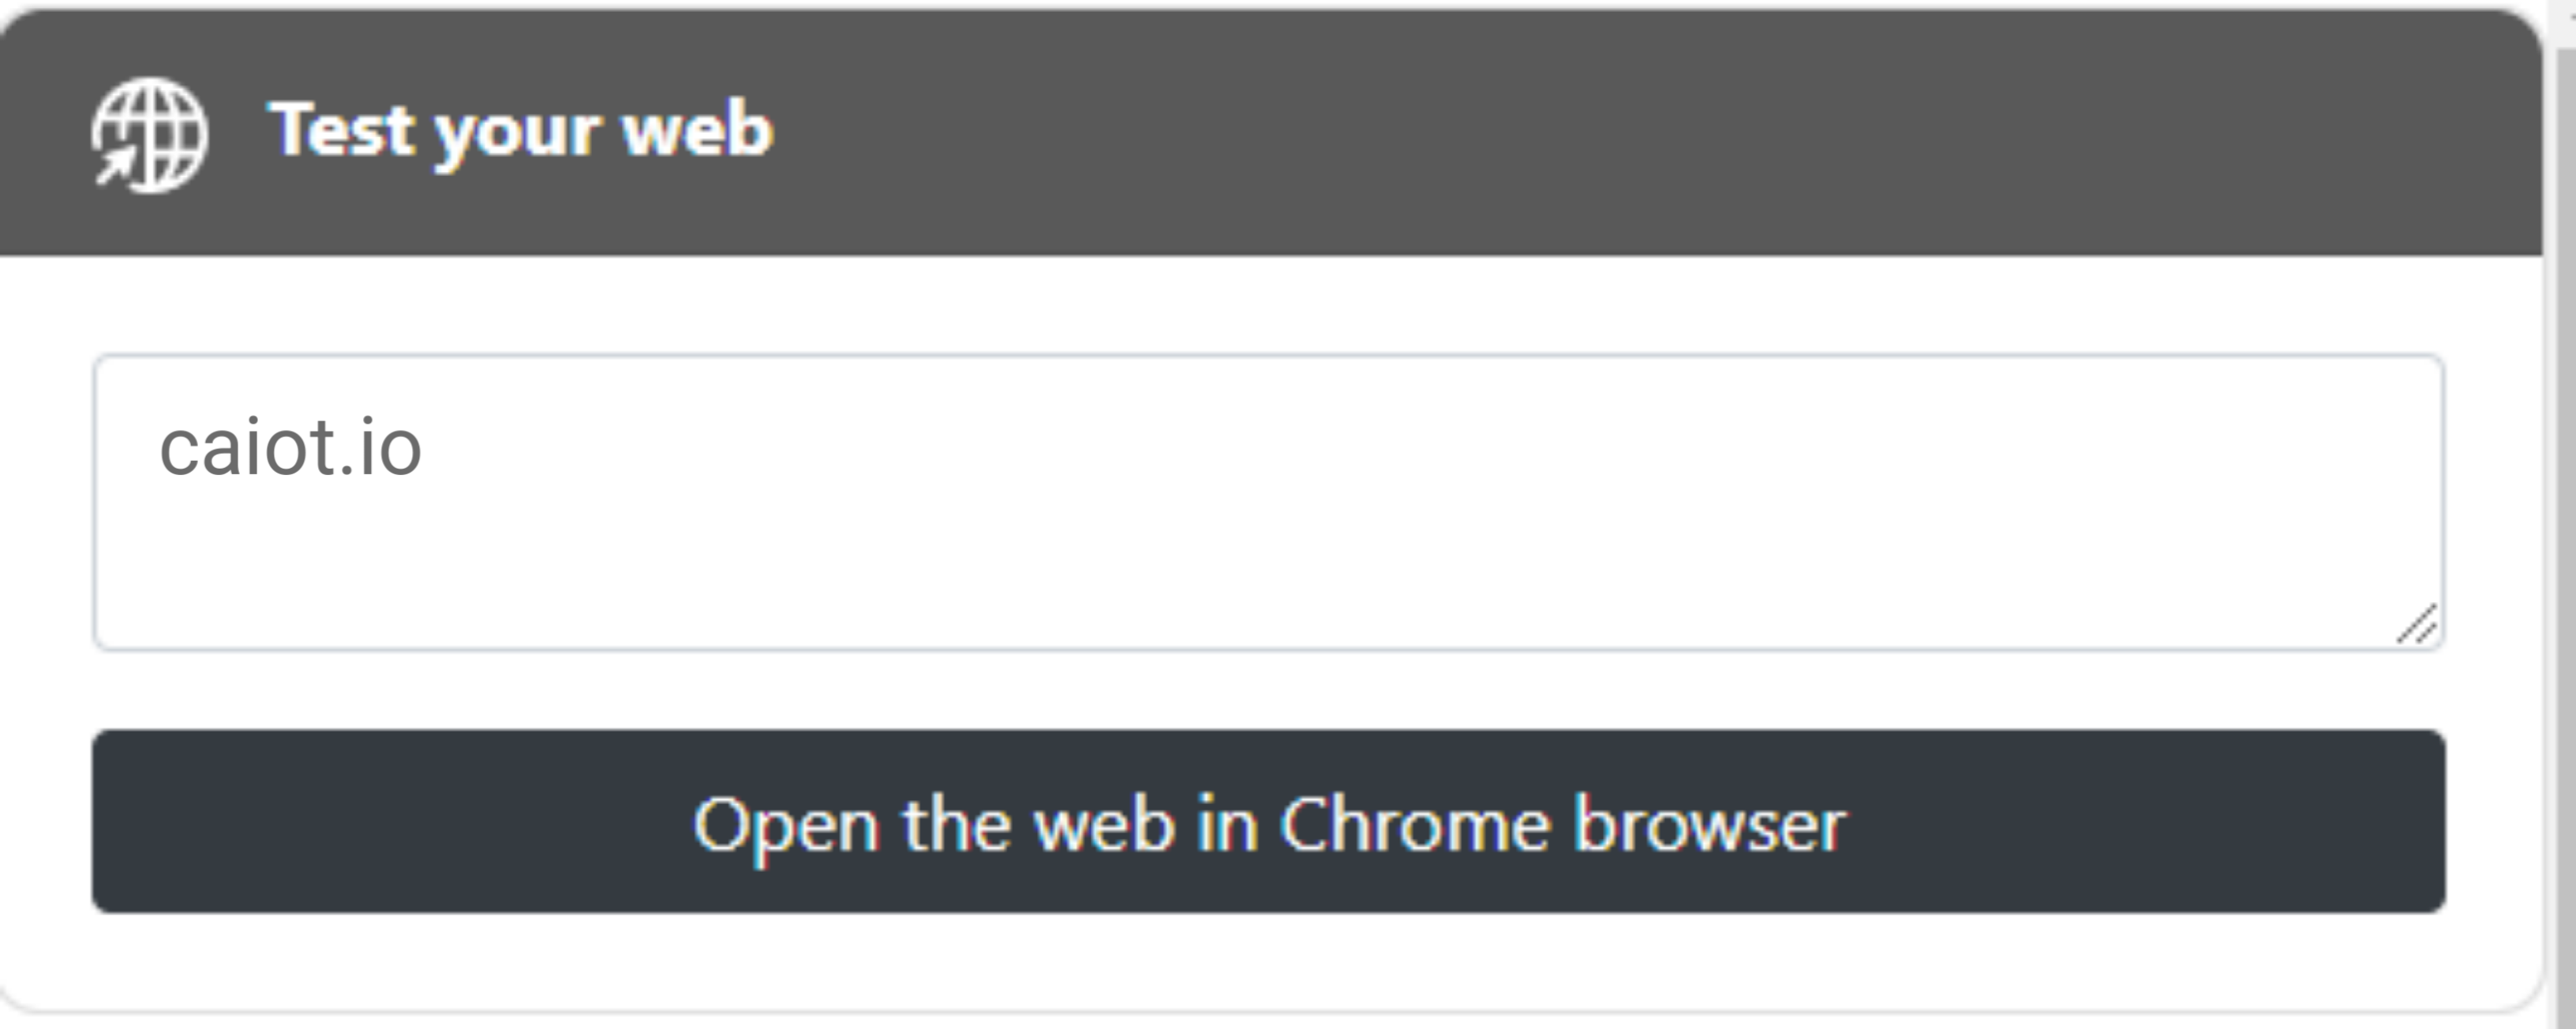
- Enter a URL for web testing on the Chrome or Safari browser.
- This allows you to quickly go to the website you want to test with a single quick step.
- Copy the URL for remote debugging directly on the device.
- This allows developers to begin debugging right away.

- Activate keyboard input for the test session.
- This allows you to use your keyboard to type directly into search bars and the like on the device, increasing the speed and efficiency at which you can enter information.
- The phone’s keyboard can be switched back to by clicking on the three dot icon on the bottom right side of the device screen.
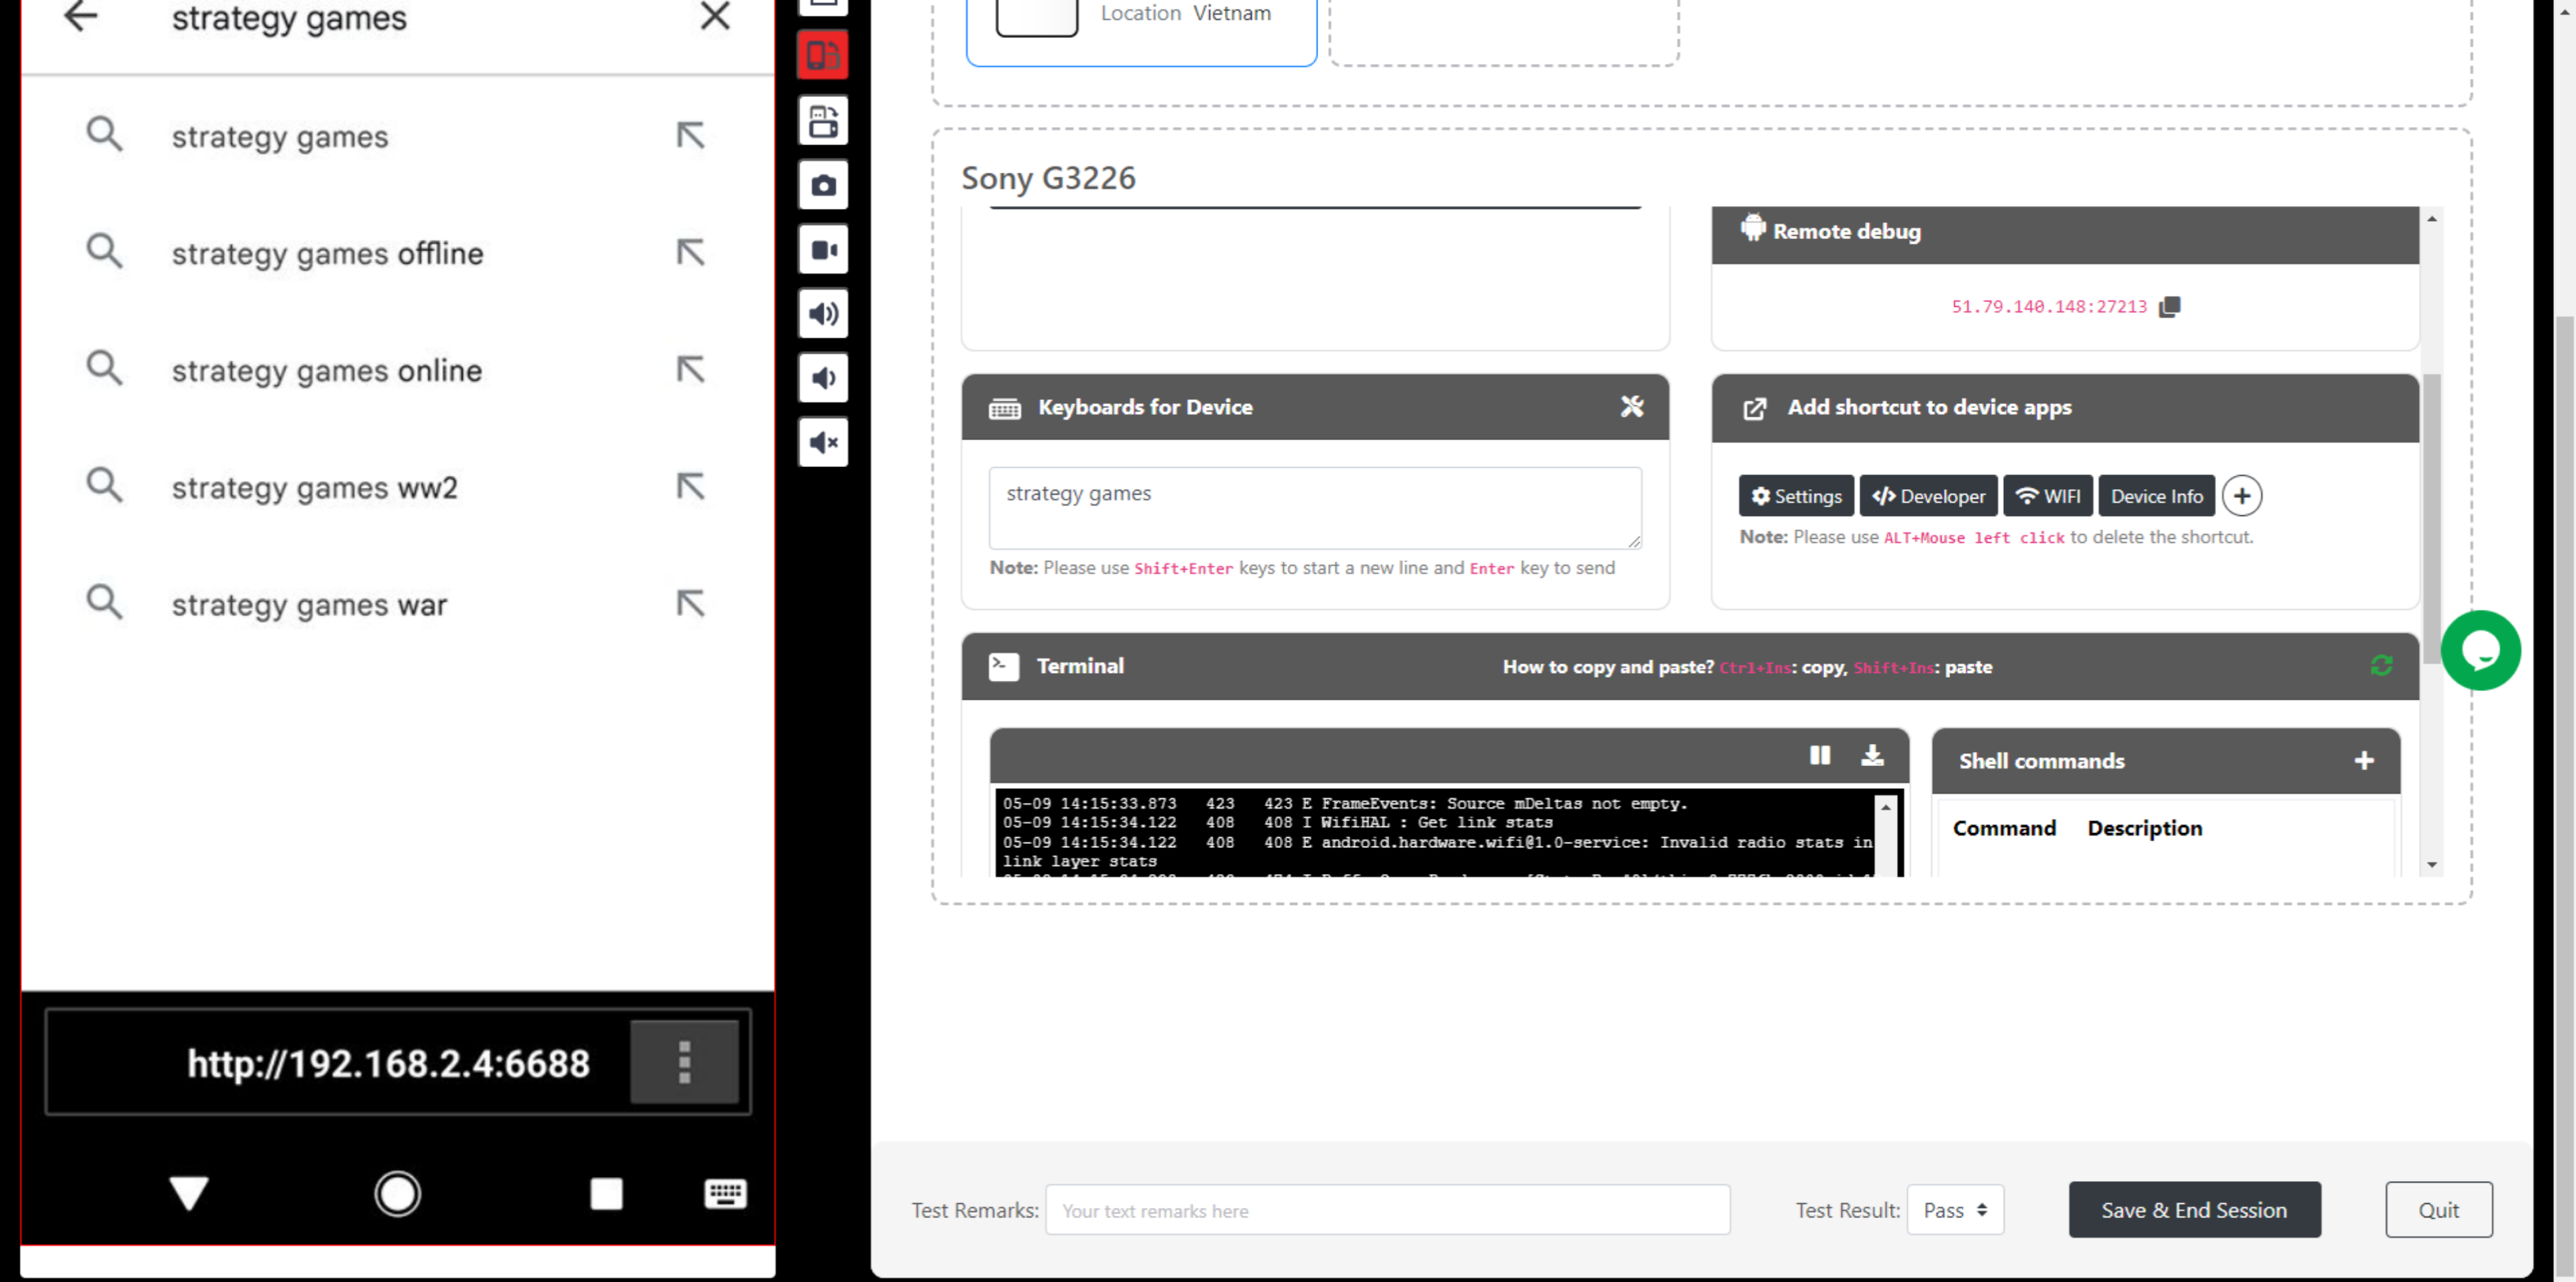
- Use or create a shortcut.
- This allows you to quickly access screens which you commonly return to in order to make your testing quicker and less of a hassle.
- Simply click on an existing shortcut or click the “+” icon to create a new one, which allows you to give the shortcut a name and a SHELL command.

- See the device terminal.
- Create a shell command.
- Refresh the device terminal by clicking the green refresh icon on the top right of the screenshot below.
- This is used in case the device terminal disappears for whatever reason.
- Start a Log Capture, which can be done by clicking the document icon on the top left directly above the terminal.
- This captures the log of whatever app is on the screen. To end it, click “Stop”, which is the square icon next to the document icon. You can then download the capture by clicking the icon next to the square icon.
